
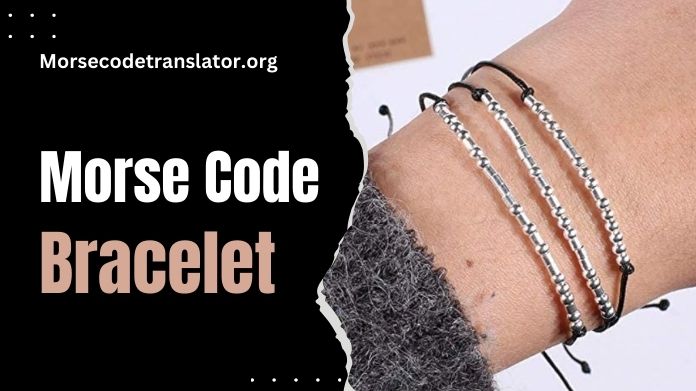
Creating a DIY Morse Code Bracelet is a fun craft project and a unique way to carry a personal or secret message with you.
Morse code, a method of transmitting text information as a series of on-off tones, lights, or clicks that a skilled listener or observer can directly understand without special equipment, offers a blend of simplicity and mystique.
This Morse Code Translator guide will walk you through making your own Morse Code Bracelet, embedding a message that holds personal significance.
Materials Needed for Morse Code Bracelet
- Beads of two different types: one type for dots and another for dashes.
- Elastic cord or any stringing material of your preference.
- Scissors.
- Tape measure or ruler.
- A clasp (optional, depending on your design).
- Clear glue (optional for securing knots).
Planning Your Message
Decide on the message you want to encode. It could be a name, a particular date, or a meaningful word.
Keep it short to maintain the bracelet’s aesthetic and wearability. Once you have your message, write down the Morse code equivalent. With that you can read our article on the Morse Code Jewellery and understand the logic.
How to Make a DIY Morse Code Bracelet?
1. Measure Your Wrist: Use the tape measure to find your wrist circumference. Add an extra inch (2.5 cm) to this measurement for comfort and to account for the beads’ space.
2. Cut the Cord: Cut a piece of the elastic cord or your chosen stringing material based on your wrist measurement.
3. Start Stringing: Begin by tying a knot at one end of the cord, leaving a tail long enough to tie the ends together once the beading is complete. If using a clasp, attach one part of the clasp to this end.
4. Stringing the Message: Refer to your written Morse code message. Start stringing the beads onto the cord, using your chosen “dot” beads for dots and “dash” beads for dashes. Separate each letter with a spacer or a different type of bead to differentiate between letters.
5. Finishing Touches: After stringing your message, finish with another knot. If you have a tail, add a dab of clear glue to secure it further before trimming any excess cord. Attach the other part of the clasp if you’re using one.
Tips for a Successful DIY Morse Code Bracelet
1. Contrast is Key: Choose beads that are easily distinguishable from each other to represent dots and dashes.
2. Bead Size and Shape: Consider the size and shape of your beads. Smaller beads make the bracelet more delicate, while larger beads can make a statement piece.
3. Durability: If you’re using an elastic cord, ensure it’s good quality to withstand wear and tear.
4. Personalization: Beyond your Morse code message, personalize your bracelet with colors or charms representing something meaningful to you or the recipient if it’s a gift.
5. Practice Makes Perfect: If you’re new to beading, practice stringing a few beads before starting on your bracelet to get a feel for the materials.
The Final Touch
Once completed, your Morse Code Bracelet will be a stylish accessory and a personal artifact carrying a secret message known only to you or shared with someone special.
It’s a testament to the ingenuity of Morse code and how it can be used in modern, creative ways.
Conclusion
DIY crafts offer an excellent opportunity to create something unique and personal. A Morse Code Bracelet is a perfect example of this, combining the art of jewelry making with the historical significance of Morse code.
Whether making it for yourself or as a thoughtful gift for a friend or family member, creating a Morse Code Bracelet is as rewarding as the final product.
Wear it proudly, knowing you’re carrying a message close to your heart – literally and metaphorically.